Documentation
Installing the cFos Charging Manager on a Raspberry Pi
1. Preparation
You will need:
- Raspberry Pi 3, 4 or higher
- a suitable power supply unit
- Micro SD card (min. 16GB)
- Card reader for MicroSD cards
- Raspberry Pi Imager Software
2. Install operating system

Install the Raspberry Pi Imager software on your computer. Insert the Micro SD card into the adapter and open the Raspberry Pi Imager.
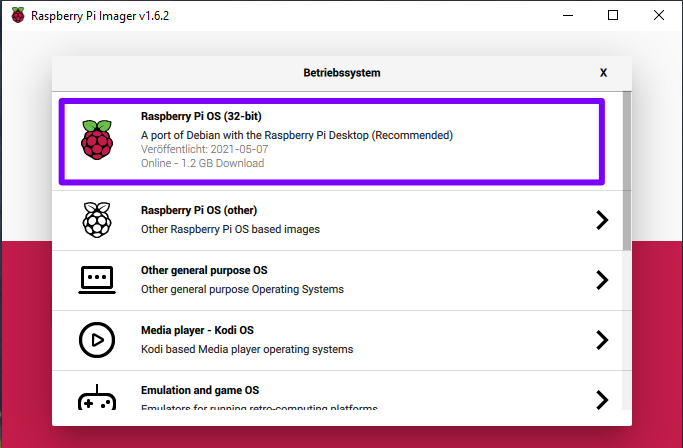
Select "Raspberry Pi OS" under: "Select OS" select "Raspberry Pi OS".
Under "Select SD card" select your Micro SD card.
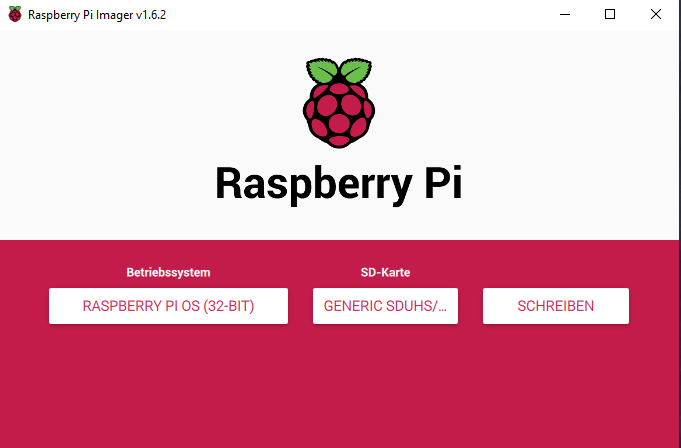
To start the write process, click on "Write". During the write process, all existing data is deleted - make sure that the correct drive is selected.
3. Set up SSH
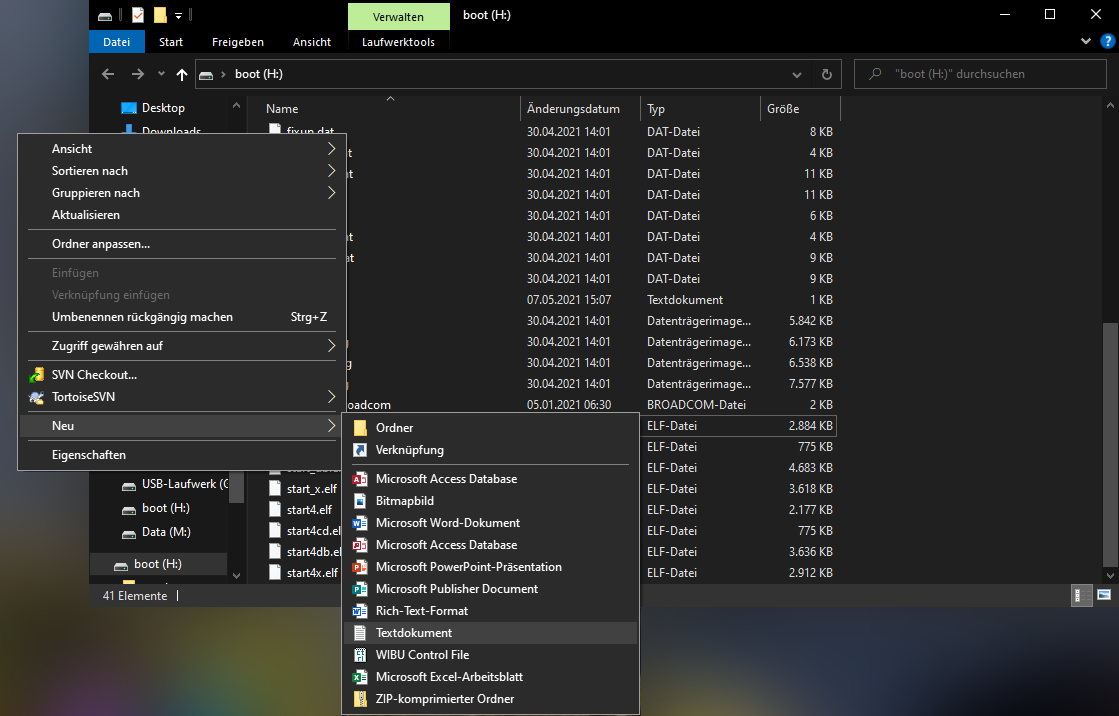
As soon as the process is completed, the main directory of the SD card opens. Here you create an empty file with the name "ssh". To do this, right-click and select "New>Text Document".
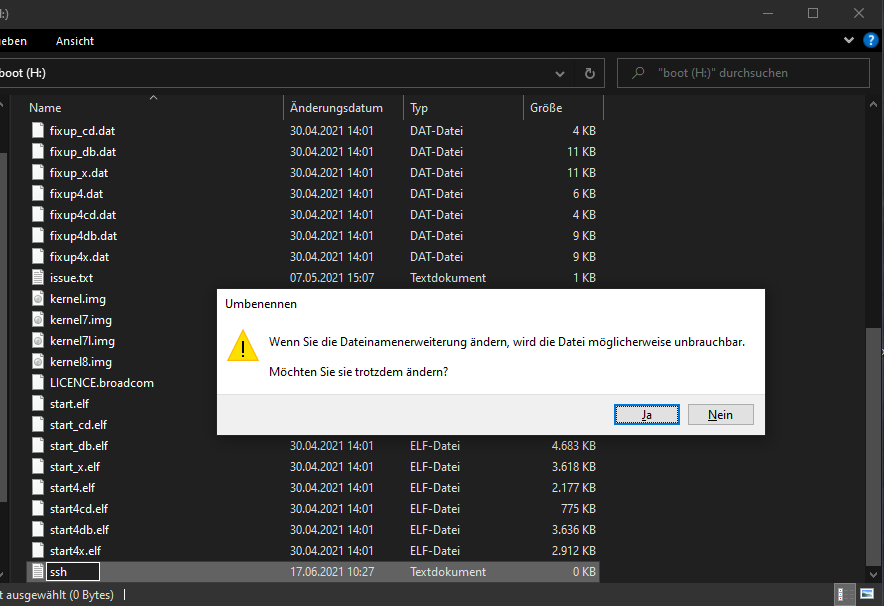
Enter "ssh" as the name and delete the suggested ".txt" behind it.
4. Connection with the Raspberry Pi
Eject the SD card and insert it into the Raspberry Pi. Connect the Raspberry Pi with a network cable and the power supply.
Wait a moment until the Raspberry Pi has booted up.
To check if the Raspberry Pi is available on your network via SSH, ping the Raspberry Pi with the following command on the command line:ping[IP address]
Ex: ping 192.168.0.153
(For example, you can open the command line by entering cmd in the Windows search. You can find out the IP address in the configuration of your router.
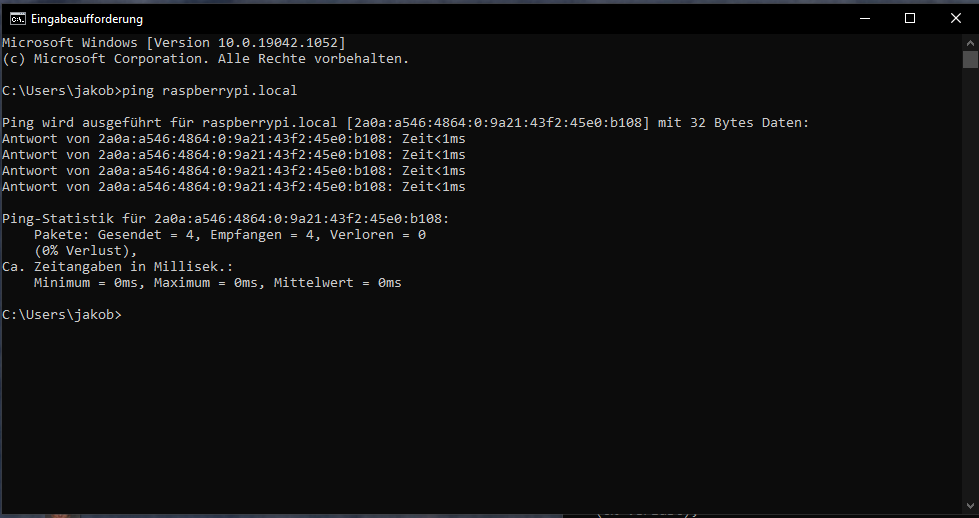
If you are using a Fritz!Box, you can also use "raspberrypi.local" instead of the IP address)
If this was successful, you can reach the Raspberry Pi via SSH. To do this, enter the following command:ssh pi@[IP address]
The password for access is: "raspberry" (The password is not visible during entry).

You will then be asked to confirm the authenticity of the host. This serves to prevent "man-in-the-middle" attacks. Since the host (your Raspberry Pi) is located in your local network, you can confirm this message with "yes".
5. Institution
Some configuration is required to proceed with the setup.
To enter the menu, enter this command:sudo raspi-config
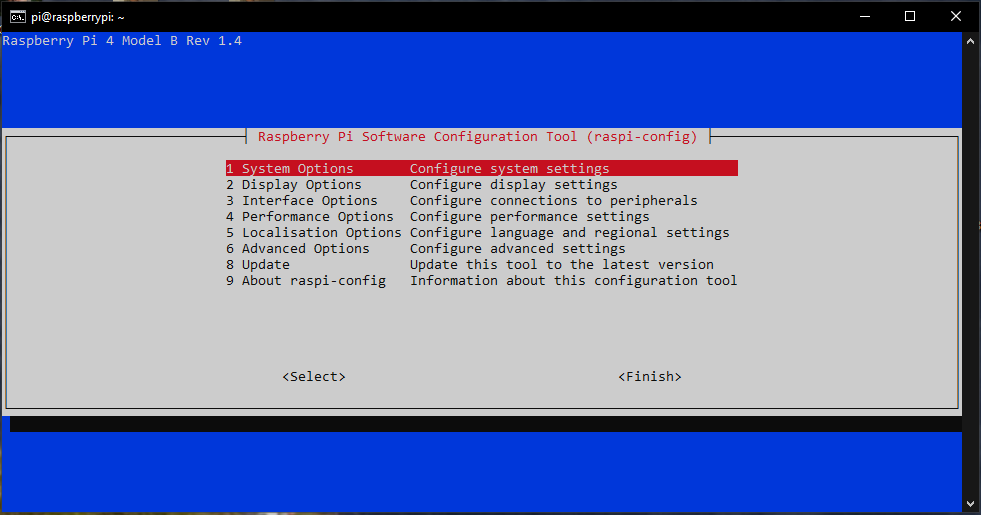
Select the entry "1 System options
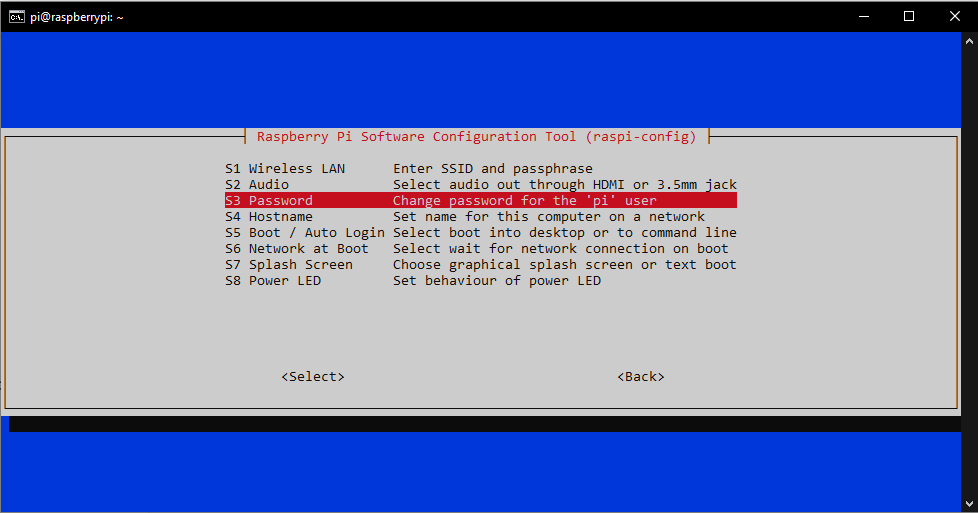
Then select "S3 Password" and assign your own password.
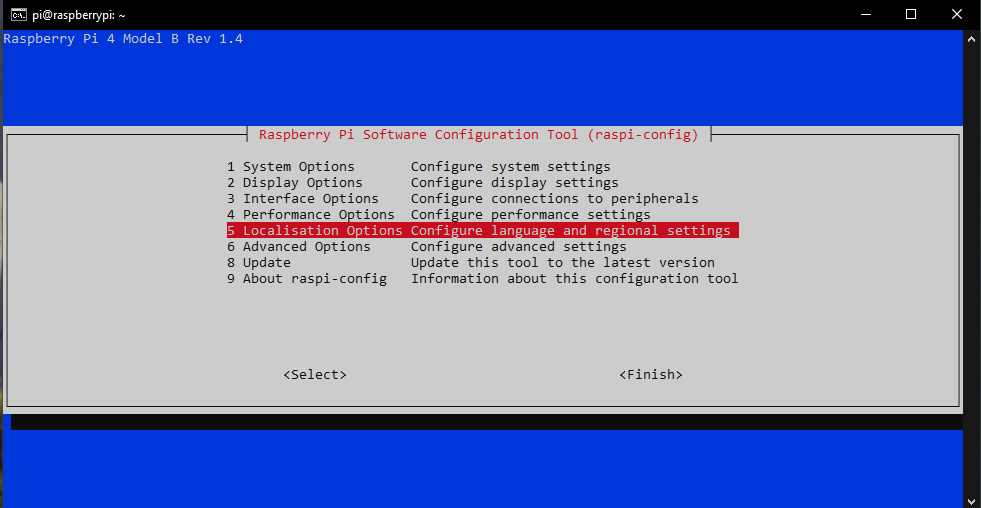
You will then be back in the main menu. Here you select "5 Localisation Options".

Then select "L2 Timezone". Set your current time zone here.
If necessary, select "5 Localisation Options" again.
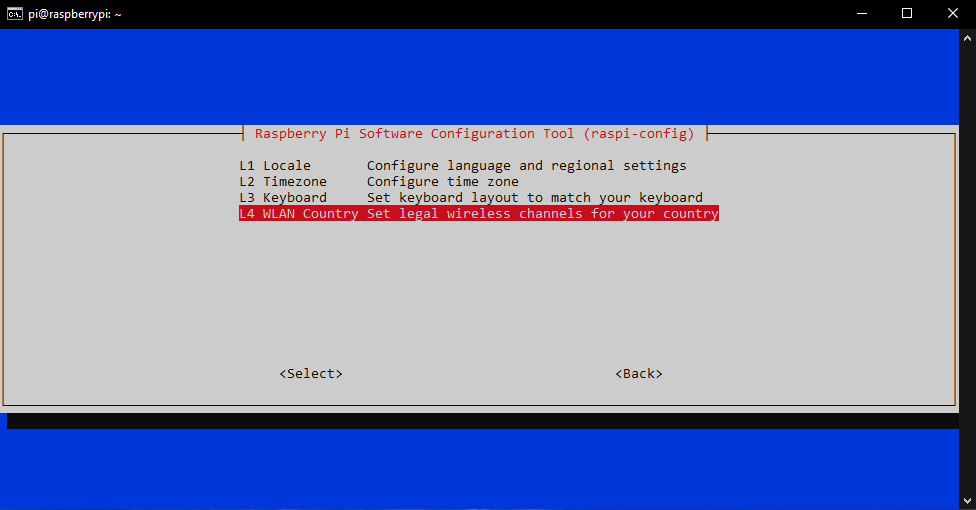
Then select "L4 WLAN Country" and set the country you are in here.
Complete the settings with "Finish".
We recommend that you make an update. You do this with the following commands. Execute the next command after the previous one has been completed.sudo apt-get updatesudo apt-get upgrade -ysudo apt-get dist-upgrade -y
6. Installation of the cFos Charging Manager
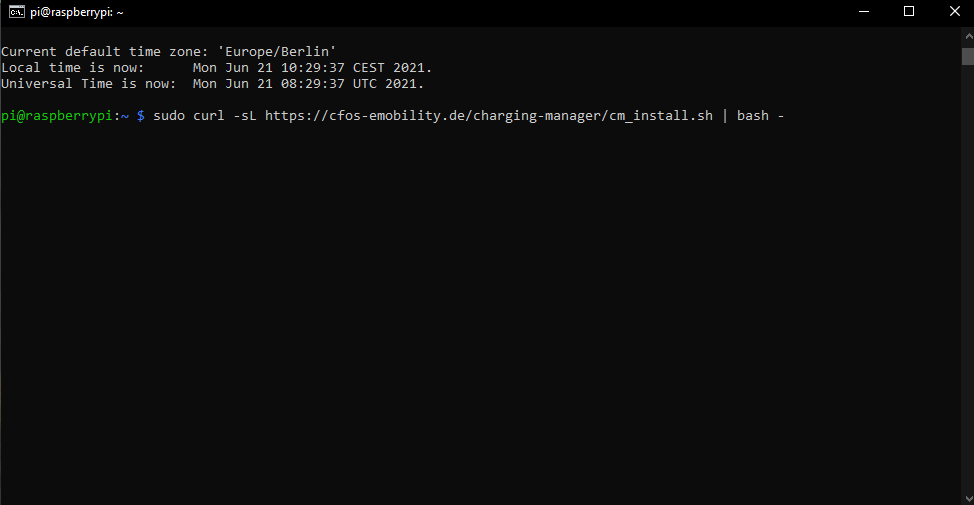
To install the cFos Charging Manager, enter the following command:curl -sL https://cfos-emobility.de/charging-manager/cm_install.sh | bash -
A menu opens. Use the arrow keys to select the installation variant and confirm with "OK".
Read and accept the licence conditions.
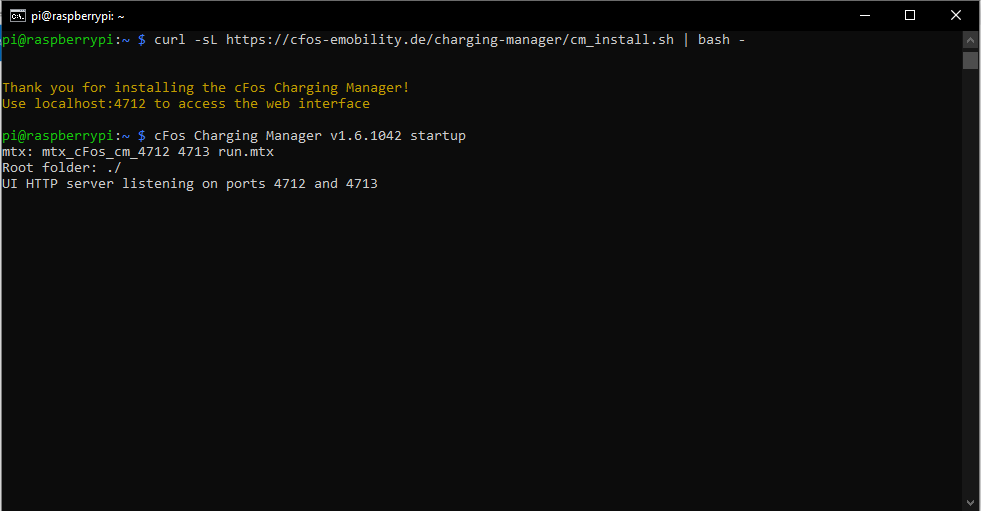
Now the cFos Charging Manager is installed.
7. Setting up the cFos Charging Manager
Write the IP address that you also used previously for access via SSH with the correct port number in the search line of your browser to open the user interface. Port 4712 is used by default.
Example: 192.168.0.153:4712
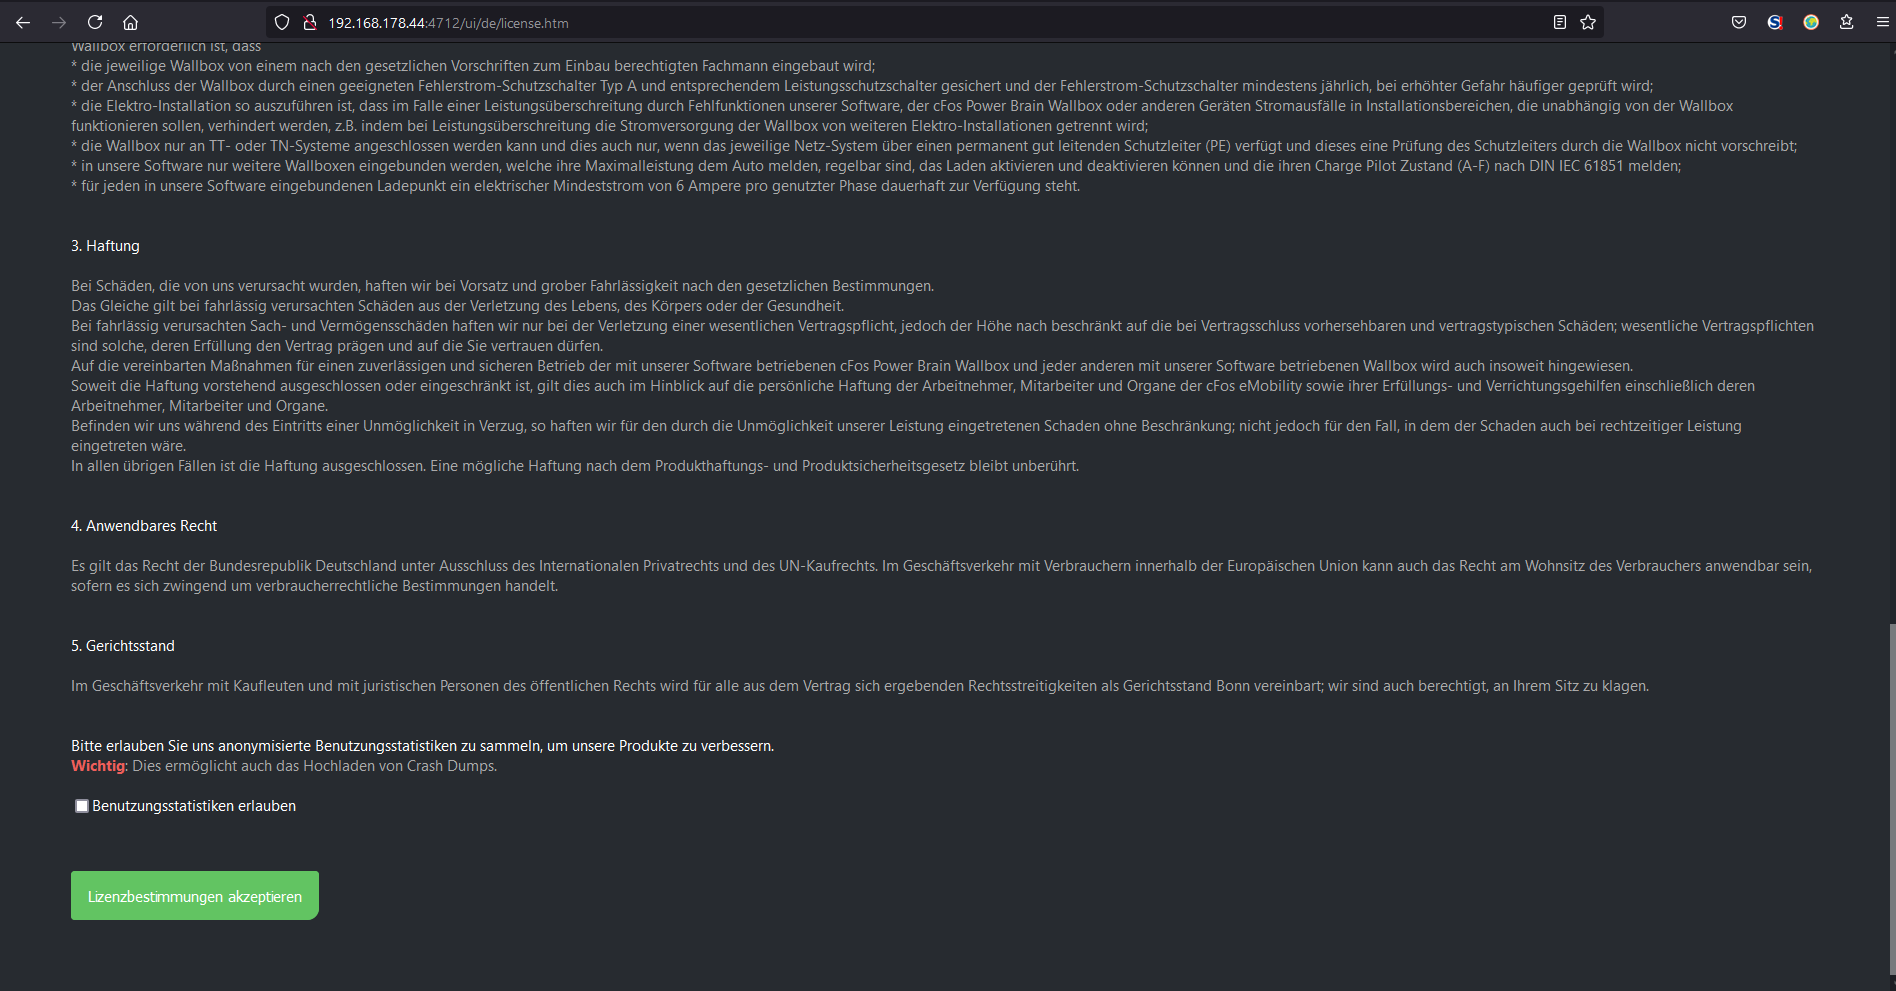
Now read and accept the licence conditions. Then you can set up the cFos Charging Manager as you wish. For further information, please refer to the commissioning instructions.
8. Dual Channel RS485 Adapter Board
If you have received the Charging Manager Kit including the Dual Channel RS485 adapter board, you still have to carry out the following steps:
sudo nano /boot/config.txt
Add the following line:
dtoverlay=sc16is752-spi1,int_pin=24
Save the change with CTRL + X
and then confirm with Y
Then reboot the Raspberry PI:
sudo reboot
After the reboot, there are 2 new devices with the RS485 interfaces:
/dev/ttySC0
/dev/ttySC1
These are addressable like the USB-based RS485 adapters and can be entered in the cFos Charging Manager under "Configuration" -> "COM Port Mapping".
9. Setting up a static IP address for the Raspberry PI
To set up a static IP address for the Raspberry PI, proceed as follows:
Open the file dhcpd.conf using sudo nano /etc/dhcpcd.conf. For LAN connections, there should be a section "interface eth0" (possibly commented out with #). For WLAN, there should be a section "interface wlan0". Change it like this (for LAN connection):interface eth0
static ip_address=192.168.2.111/24
static routers=192.168.2.1
static domain_name_servers=192.168.2.1 .
Here you have to adjust the IP address of your router (and DNS server) if it is not 192.168.2.1 and enter your desired fixed (available) IP address under "static ip_address". Afterwards, you should reboot the Raspberry Pi using sudo reboot.
Source: Instructions for setting up the Raspberry PI with a static IP address.
10. Note
If a lot of data is written to the SD card, it may wear out. Regularly make a data backup so that you do not have to set up the configuration completely again in the event of a failure.
Alternatively, you can set up your Raspberry Pi to boot from a USB hard drive. You can find the instructions here